Chest Supported Row: The Ultimate Guide
The Chest Supported Row is a horizontal pulling exercise performed with the chest braced against an incline bench, targeting the middle back muscles while minimizing lower back involvement for a safer, more isolated back training experience.
Quick Facts
Key Benefit
Upper back development with reduced lower back involvement
Primary Muscles
Lats, Posterior Deltoids, Rhomboids, Traps
Secondary Muscles
Biceps, Brachialis, Forearms, Rotator Cuff
Equipment
dumbbells, incline bench
Difficulty
Beginner
Type
Compound
In This Guide
Ready to master the Chest Supported Row?
Track your progress, see improvements over time, and build strength consistently.
Download GravitusThe Chest Supported Row is an excellent back-building exercise that provides the benefits of horizontal rowing movements while eliminating many of their common drawbacks. By bracing the chest against an incline bench, this exercise removes the lower back from the stability equation, allowing for targeted focus on the primary pulling muscles—the latissimus dorsi, rhomboids, trapezius, and rear deltoids. Traditional bent-over rows require significant core and lower back strength to maintain proper positioning, which can limit the weight that can be used safely or lead to form breakdown. The chest supported variation solves this problem by providing external support for the torso, creating a stable platform from which to pull. This stability not only reduces injury risk but also enhances mind-muscle connection with the target back muscles. Without having to focus on maintaining torso position, you can direct more mental energy toward feeling the working muscles and executing the movement with precision. Whether you're new to back training, working around lower back limitations, or simply looking to add a highly effective row variation to your routine, the Chest Supported Row delivers exceptional results while being accessible to lifters of virtually all experience levels.
Benefits of Chest Supported Rows
Chest Supported Rows offer several distinct advantages compared to other horizontal pulling movements.
Reduced Lower Back Stress
By supporting the torso on an incline bench, this exercise minimizes the stabilization demands on the lower back, making it more accessible for those with back concerns.
Enhanced Mind-Muscle Connection
With torso stability handled by the bench, you can focus more intently on feeling and engaging the target back muscles throughout the movement.
Proper Scapular Mechanics
The stable position encourages correct shoulder blade movement during the pulling phase, teaching proper retraction and depression.
Eliminates Momentum
The fixed position prevents using body english or momentum to move the weight, ensuring the back muscles do the work rather than body swing.
Unilateral Option
Can be performed with two dumbbells or one arm at a time, allowing for identification and correction of strength imbalances between sides.
Safe Progressive Overload
The stability provided often allows for heavier loading with proper form compared to unsupported rowing variations.
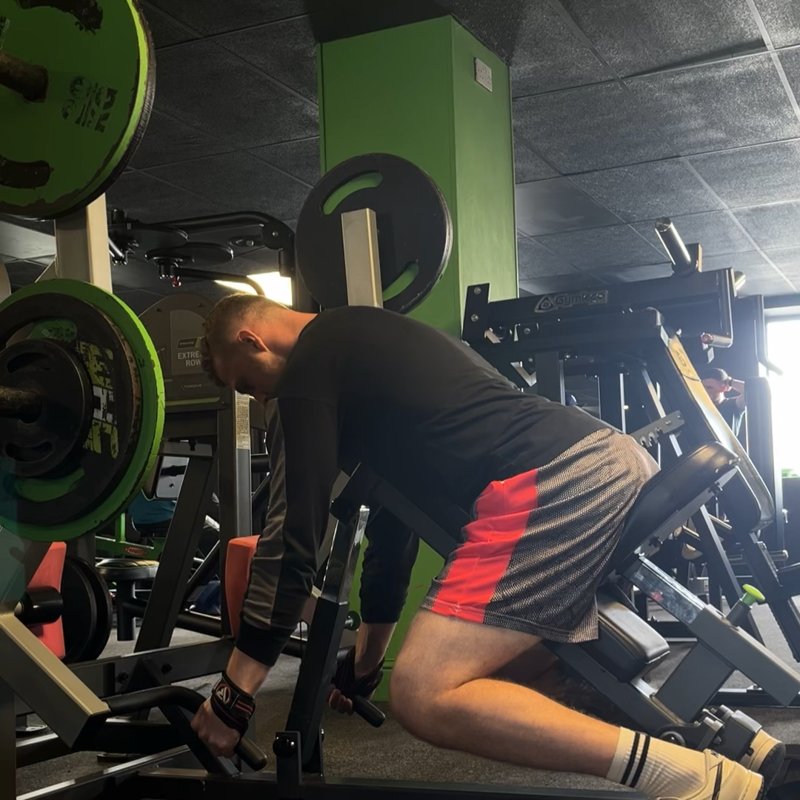
Proper Form & Technique
Setup
- Set an adjustable bench to a 30-45 degree incline (around 30° for more lat emphasis, closer to 45° for greater upper back focus).
- Select appropriate dumbbells that challenge you while allowing proper form.
- Position yourself face down on the bench with your chest firmly supported against the pad.
- Allow your arms to hang straight down from your shoulders, holding a dumbbell in each hand with a neutral grip (palms facing each other).
- Align your head with your spine in a neutral position, either looking slightly forward or down toward the floor.
- Position your feet firmly on the ground for stability, or on the foot supports if the bench has them.
- Engage your core and set your shoulders by pulling them slightly back and down to establish a stable starting position.
Movement
- Begin by taking a deep breath and bracing your core.
- Initiate the pull by retracting your shoulder blades—think of squeezing them together slightly before bending your elbows.
- Pull the dumbbells toward your body by driving your elbows up and back, keeping them close to your sides.
- Focus on using your back muscles rather than your biceps to move the weight.
- Continue pulling until the dumbbells reach the sides of your torso, with elbows positioned slightly behind the body.
- Squeeze your shoulder blades together at the top position to maximize back muscle contraction.
- Hold the contracted position briefly (1-2 seconds) to enhance mind-muscle connection.
- Slowly lower the dumbbells back to the starting position, allowing your arms to fully extend and your shoulder blades to protract slightly.
- Maintain control throughout the lowering phase, resisting the pull of gravity.
- Repeat for the prescribed number of repetitions, maintaining quality movement throughout the set.
Key Form Tips
Elbow Path
Drive your elbows up and back rather than out to the sides to maximize lat engagement.
Shoulder Blade Movement
Focus on the retraction and depression of your shoulder blades during the pull for optimal back activation.
Range of Motion
Achieve full extension at the bottom and complete contraction at the top without compromising form.
Torso Position
Keep your chest firmly pressed against the bench throughout the entire movement.
Head Alignment
Maintain a neutral neck position aligned with your spine, avoiding excessive looking up or tucking down.
Muscles Worked
Primary Muscles
- lats: The large, wing-shaped muscles of the back that are engaged during the pulling motion, particularly when the elbows are kept close to the body.
- rhomboids: The muscles between the shoulder blades that retract the scapulae and are heavily engaged during the squeezing phase of the row.
- traps: The trapezius muscle, with middle fibers working to retract the scapulae during the pulling movement, and the lower fibers assisting in stabilizing and depressing the shoulder blades.
- posterior deltoids: The posterior portion of the shoulder muscles that assist in horizontal pulling and contribute significantly to upper back development.
Secondary Muscles
- biceps: The front arm muscles that flex the elbow during the pulling motion, serving as important secondary movers.
- rotator cuff: Smaller muscles of the upper back that assist in shoulder extension and stabilization during the pull.
- infraspinatus and supraspinatus: Rotator cuff muscles that help stabilize the shoulder joint throughout the movement.
- brachialis: Arm muscles that assist with elbow flexion during the pulling phase of the row.
- forearms: The muscles of the forearm that maintain your grip on the dumbbells throughout the exercise.
Common Mistakes and How to Fix Them
Lifting Chest Off the Bench
Raising your chest from the bench negates the primary benefit of this exercise—torso stability. Keep your chest firmly pressed against the pad throughout the entire movement. If you find yourself lifting off the bench, the weight is likely too heavy. Reduce the load until you can maintain proper positioning. Consider having a training partner observe your form or setting up near a mirror that allows you to see your side profile. If the bench angle is too steep, try adjusting to a slightly lower incline, which some lifters find more comfortable for maintaining chest contact.
Excessive Elbow Flare
Allowing the elbows to point out to the sides instead of pulling back toward your hips. Keep your elbows relatively close to your torso during the pull, driving them up and back rather than out to the sides. This position better engages the lats and reduces stress on the shoulder joints. Think about trying to put your elbows in your back pockets, which encourages the proper pulling pattern. If your elbows consistently flare out, try consciously focusing on the proper path for several sets with lighter weight until the movement pattern becomes more natural.
Using Momentum
Jerking or using rapid movements to swing the weight up rather than controlling the motion. Maintain a steady, controlled tempo throughout the exercise—perhaps 2 seconds to pull up, 1-second squeeze at the top, and 2-3 seconds to lower. The chest-supported position should eliminate most opportunities for momentum, but some lifters still rush the movement. If you find yourself unable to control the weight, reduce the load and focus on feeling the target muscles work. Remember that the quality of muscle contraction is more important than the amount of weight moved, particularly for this exercise.
Insufficient Range of Motion
Not achieving full extension at the bottom or complete contraction at the top of the movement. Allow your arms to extend fully at the bottom position to stretch the lats and mid-back muscles, and pull until the dumbbells reach the sides of your torso with your elbows slightly behind your body at the top. If limited range of motion is caused by excessive weight, reduce the load to prioritize complete movement. Some lifters find that consciously focusing on the end ranges for several sessions helps establish proper movement patterns. Consider implementing paused reps (2-3 second hold at the top position) to reinforce complete contraction.
Wrist Rotation During Pull
Changing wrist orientation during the movement rather than maintaining a consistent grip. Keep your wrists neutral and firm throughout the exercise, avoiding the tendency to rotate them as you pull. Maintain the same grip position (neutral/palms facing each other, pronated/palms down, or supinated/palms up) from start to finish of each repetition. Wrist rotation during the movement can reduce force transfer to the target muscles and potentially cause strain. If grip is a limiting factor, consider using lifting straps for heavier sets, while continuing to train grip strength separately.
Pulling Primarily with Arms
Using mostly biceps and forearms rather than engaging the back muscles as primary movers. Focus on initiating the pull by retracting your shoulder blades before bending your elbows. Think of your hands as hooks and your arms as ropes—the power should come from your back. Practice the movement with very light weight or even no weight, concentrating on squeezing your shoulder blades together first, then bending the elbows. Some lifters find it helpful to perform a few sets of "dead-stop" rows, where you pause briefly at the bottom of each rep to reset and focus on proper back engagement before each pull.
Exercise Variations
Grip Variations
-

Pronated Grip Row
Using an overhand grip (palms facing down) to place greater emphasis on the upper back, rhomboids, and rear deltoids.
-
Supinated Grip Row
Employing an underhand grip (palms facing up) to increase biceps involvement and target the lower lats more effectively.
-
Mixed Grip Row
Using one pronated and one supinated grip simultaneously to create a subtle rotational stimulus while maintaining stability.
-
Wide Grip Row
Positioning hands wider than shoulder width to increase emphasis on the upper back, particularly the rhomboids and trapezius.
Equipment Variations
-
Barbell Chest Supported Row
Using a barbell instead of dumbbells, typically performed on a T-bar row machine with chest support or a specialized chest-supported row machine.
-
Cable Chest Supported Row
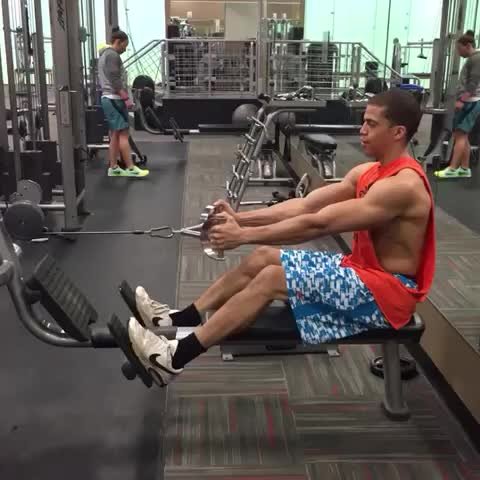
Performing the movement with a cable and appropriate attachment while lying chest-down on an incline bench for constant tension throughout the range of motion.
-
Chest Supported Row Single Arm
Executing the exercise one arm at a time to address potential imbalances and increase core anti-rotation demands.
-
Meadows Row
A specialized version using a landmine attachment with the chest supported on an incline bench, offering a unique loading angle and range of motion.
Technical Variations
-
Paused Row
Adding a deliberate 2-3 second isometric hold at the point of maximum contraction to increase time under tension and enhance mind-muscle connection.
-
Eccentric-Focused Row
Emphasizing the lowering phase with a 4-5 second negative to increase muscle damage and hypertrophy stimulus.
-
Rotational Row
Adding a subtle rotation at the top of the movement to increase rear deltoid engagement, particularly effective with the single-arm variation.
-
Drop Set Row
Performing a set to near failure, then immediately reducing the weight and continuing for additional repetitions without rest to increase training volume and metabolic stress.
Frequently Asked Questions
The optimal bench angle for chest supported rows typically falls between 30-45 degrees, but the exact setting depends on your specific goals and individual biomechanics. A lower incline (around 30 degrees) tends to emphasize the latissimus dorsi more by creating a pulling angle that better engages these muscles. A higher incline (closer to 45 degrees) shifts more emphasis to the upper back muscles like the rhomboids and middle trapezius. For most lifters, starting at approximately 30-35 degrees provides a good balance that works the entire back effectively while maintaining comfortable chest support. If you experience any discomfort at a particular angle, adjust accordingly—comfort is important for maintaining proper positioning throughout the set. Some lifters find that experimenting with different angles across different training sessions provides a more comprehensive back development by slightly altering the stress on various muscle groups. As a general guideline, ensure the bench is steep enough to provide solid chest support but not so vertical that maintaining contact becomes uncomfortable or causes your head to hang awkwardly.
Neither exercise is inherently "better"—they each offer distinct advantages that make them complementary rather than competitive. Chest supported rows excel at isolating the back muscles by removing lower back fatigue and core stability as limiting factors. This often allows for better mind-muscle connection, more precise targeting of the back muscles, and can be particularly valuable for those with lower back issues or core stability limitations. They're also generally easier to learn and perform with proper form, making them excellent for beginners. Bent-over rows, however, engage more total musculature by requiring significant core, lower back, and hamstring involvement for stabilization. This makes them more functional and potentially better for overall strength development. They also allow for a slightly different range of motion that some lifters find provides superior back stimulation. For most trainees, incorporating both variations in a training program offers the most comprehensive development. You might use chest supported rows when maximizing back isolation is the priority or when training volume is high and lower back fatigue is a concern. Conversely, bent-over rows might be emphasized when developing functional strength or when core engagement is a desired component of the exercise.
Most people respond well to training each major muscle group 2-3 times per week with sufficient recovery between sessions. For horizontal pulling movements like the chest supported row, incorporating them 1-2 times weekly is typically optimal for most trainees. If following a body part split, you might perform this exercise on your designated back or pull day once per week. With an upper/lower split, it could be included in one of your two weekly upper body sessions. For full-body training, it might appear in 1-2 of your 3-4 weekly workouts. Consider your overall back training volume—the chest supported row is just one component of complete back development that should be balanced with vertical pulling (pull-ups, lat pulldowns), direct rear deltoid work, and potentially other row variations. More advanced lifters might benefit from undulating approaches where the exercise appears twice weekly but with different loading parameters each session (e.g., heavier/lower reps in one session, lighter/higher reps in another). Monitor recovery between sessions—if back performance decreases or joint discomfort develops, you may need more recovery time or reduced volume. A good starting point is performing 3-4 working sets 1-2 times weekly, adjusting based on your individual response.
The optimal loading strategy for chest supported rows depends on your specific goals, training experience, and where this exercise fits within your overall program. For muscle building (hypertrophy), which is the primary goal for most people performing this exercise, moderate weights allowing 8-12 controlled repetitions typically provide the best stimulus. This rep range creates sufficient mechanical tension while allowing proper form and mind-muscle connection. For more strength-oriented goals, heavier loads in the 6-8 repetition range can be effective, though the stability provided by the bench often allows for maintaining proper form even with challenging weights. For muscular endurance or when focusing on form refinement, lighter weights for 12-15+ repetitions may be preferable. A well-rounded approach often includes phases of each loading strategy—perhaps spending 4-6 weeks focusing on moderate-rep hypertrophy work, followed by a strength phase with heavier weights, then a higher-rep accumulation phase. Regardless of the loading strategy, proper form should always take precedence over weight used. Unlike some exercises where momentum can compensate for form breakdown, the fixed position of chest supported rows makes proper execution essential for both results and joint health. Consider implementing a double progression approach—once you can complete all prescribed repetitions with good form for multiple consecutive workouts, increase the weight by 5-10% and begin the progression again.
There is no single "best" grip for chest supported rows—each grip variation offers unique benefits and emphasizes slightly different aspects of back development. The neutral grip (palms facing each other) is often considered the most comfortable and natural pulling position for most people. It places the shoulders in a biomechanically advantageous position and typically allows for a strong mind-muscle connection with the lats and mid-back. The pronated grip (palms facing down/overhand) tends to increase emphasis on the upper back muscles like the rhomboids, middle trapezius, and rear deltoids. Many lifters find this grip particularly effective for building upper back thickness and improving posture. The supinated grip (palms facing up/underhand) typically increases biceps involvement and can better target the lower fibers of the latissimus dorsi. For many lifters, this grip allows a stronger contraction at the top of the movement. For optimal development, consider rotating between different grip variations either within the same workout (different grips for different sets) or across different training sessions. This approach ensures comprehensive back development by stimulating all areas of the musculature through slightly different mechanical positions. If you're new to the exercise, start with the neutral grip to master the basic movement pattern, then gradually incorporate other grip variations as you progress.
Video Demonstrations

Log in to watch video demonstrations
Login to Watch3 video demonstrations available
Find more video demonstrations in the Gravitus app
Tips from the Community
-

Lock lats, flare elbows
-

Ensure good tut
-

pull from your pinkies
Track your progress with Gravitus
Download Gravitus to log your workouts, track your progress, and join a community of fitness enthusiasts.

Related Exercises
Lat Pulldown
Lats

Incline Dumbbell Row
Lats
Prime Extreme Row
Lats
Seated Row
Lats, rhomboids
Close Grip Underhand Lat Pulldown
Lats, rhomboids
Helpful Resources
One Rep Max Calculator
Find your one rep max for any exercise without maximal testing. Essential for developing effective strength training programs.
Calculate 1RMWorkout Programs
Follow structured workout programs created by fitness professionals to maximize your strength and muscle gains.
View Programs